I’ve found that printing bigger on an Ender 3 than the maximum advertised print area of 220x220mm. It is fiddly but straight-forward. But there are a couple of gotcha’s that need addressing. The on-line how-to’s I have read on maximising the print area on an Ender 3 don’t seem to address them.
First of all, my Ender 3 is an old 8 bit machine running 1.1.6.2 release software. This is what it came with. I have found that with my machine there is no need to change the code in order to get the printer to print out-side the 220×220 envelope. This may not be true for everyone (see here) but it’s worth giving this a go first to save the hassle of a code change. I have used nothing exotic except a standard Creality glass bed and don’t use spring clips to hold it on. Instead I use cut down book binders as described in this post
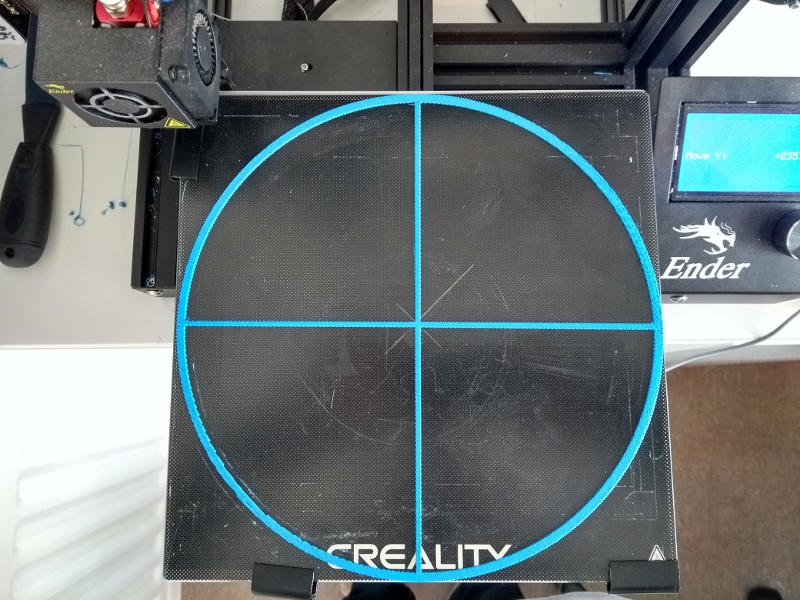
A simple outsize Print Test
To test out printing bigger on an Ender 3 I threw together a simple circular target in Freecad. I have managed to print a circular target with a diameter of 233mm. Why not 235mm? The Creality glass bed I use has slightly rounded edges. If you try with less that about 1.0mm the print lips off the edge.
Offsets
The biggest Gotcha is the fact that the “home” position of the print head (on my machine anyway) is actually off the bed by about 1,5,0.
If you were to print at 0,0,0 (without adjusting the home offset position) then you would print into thin air.
Of course the usual remedy for this is to move the print head to the corner of bed and then set that as the home offset position. This is easy to do and is explained in this post Here.
Normally this is a perfectly acceptable solution for almost all print jobs. But not if you want to use the maximum area of the bed.
The main problem is the 5mm offset in the y direction. By zero adjusting to the bed corner as you normally you lose 5mm of the maximum bed travel (you also lose the 1mm in the x direction too) so you are straight-away limited to 230mm y direction travel (or 227mm if you account for the rounded edges and a smidgeon of tolerance)
The only simple solution that I have is move the glass bed. So instead of moving the print head to the corner of the glass bed you move the corner of the glass bed to the printhead. (don’t forget to change the zero position to equal the home position of the parked extruder head!)
Not a pretty solution I know.
You end up with the glass bed overhanging the front edge of the steel base plate by ~5mm in the y direction and ~1mm in the x direction. However I would argue that this level of overhang is not going to screw up the bed heating. For a glass bed anyway – it has a relatively large thermal capacity and so takes longer to cool.
Outsize Printing: Gcode Skirts and Brims
The other gotcha’s relate to building the Gcode. First of all, my favourite slicer – Prusa-Slic3r with it’s in-built profile for the Ender 3 won’t allow you to slice anything bigger than 220x220mm if you are using the Ender 3 profile. I would image that this can be changed but rather than risk mucking up my prized Prusa-Slic3r, I simply used Slic3r.
Obviously (or maybe not obviously) you have to turn off the brim and skirt settings. If you don’t then they are the items that dictate the maximum area in which you can print. They have to be accommodated on the print bed and they are larger than the enclosed model.
This has a couple of ramifications. The extruder does not get to extrude until it literally starts printing the job, which is not a good idea. So it would be wise to figure out adding some gcode to slic3r to get a little test extrusion done in a spare area before starting the print. I didn’t bother. But then, I was only printing targets to see what size I could print.
So that’s a simple way to get printing bigger on an Ender 3. I hope that helps.