So, you want to transfer some files from your phone to your Ubuntu PC. But you are getting Bluetooth file Transfer Problems and nothing is getting downloaded to your PC. You have ensured Bluetooth is on. You checked that your phone is registered with Ubuntu. But still the damn thing won’t let you transfer files to your laptop from your phone.
Continue readingAuthor: Chalkie
Printing Bigger on an Ender 3
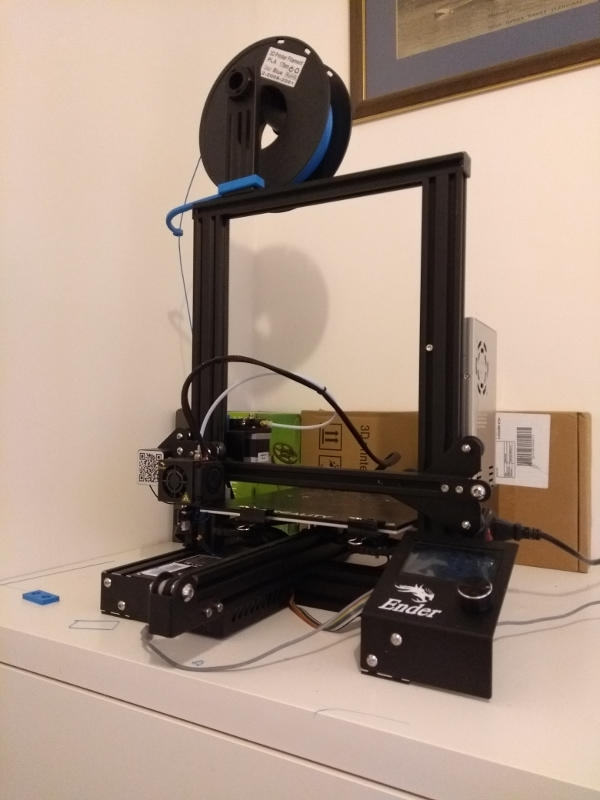
I’ve found that printing bigger on an Ender 3 than the maximum advertised print area of 220x220mm. It is fiddly but straight-forward. But there are a couple of gotcha’s that need addressing. The on-line how-to’s I have read on maximising the print area on an Ender 3 don’t seem to address them.
First of all, my Ender 3 is an old 8 bit machine running 1.1.6.2 release software. This is what it came with. I have found that with my machine there is no need to change the code in order to get the printer to print out-side the 220×220 envelope. This may not be true for everyone (see here) but it’s worth giving this a go first to save the hassle of a code change. I have used nothing exotic except a standard Creality glass bed and don’t use spring clips to hold it on. Instead I use cut down book binders as described in this post
A simple outsize Print Test
To test out printing bigger on an Ender 3 I threw together a simple circular target in Freecad. I have managed to print a circular target with a diameter of 233mm. Why not 235mm? The Creality glass bed I use has slightly rounded edges. If you try with less that about 1.0mm the print lips off the edge.
Offsets
The biggest Gotcha is the fact that the “home” position of the print head (on my machine anyway) is actually off the bed by about 1,5,0.
If you were to print at 0,0,0 (without adjusting the home offset position) then you would print into thin air.
Of course the usual remedy for this is to move the print head to the corner of bed and then set that as the home offset position. This is easy to do and is explained in this post Here.
Normally this is a perfectly acceptable solution for almost all print jobs. But not if you want to use the maximum area of the bed.
The main problem is the 5mm offset in the y direction. By zero adjusting to the bed corner as you normally you lose 5mm of the maximum bed travel (you also lose the 1mm in the x direction too) so you are straight-away limited to 230mm y direction travel (or 227mm if you account for the rounded edges and a smidgeon of tolerance)
The only simple solution that I have is move the glass bed. So instead of moving the print head to the corner of the glass bed you move the corner of the glass bed to the printhead. (don’t forget to change the zero position to equal the home position of the parked extruder head!)
Not a pretty solution I know.
You end up with the glass bed overhanging the front edge of the steel base plate by ~5mm in the y direction and ~1mm in the x direction. However I would argue that this level of overhang is not going to screw up the bed heating. For a glass bed anyway – it has a relatively large thermal capacity and so takes longer to cool.
Outsize Printing: Gcode Skirts and Brims
The other gotcha’s relate to building the Gcode. First of all, my favourite slicer – Prusa-Slic3r with it’s in-built profile for the Ender 3 won’t allow you to slice anything bigger than 220x220mm if you are using the Ender 3 profile. I would image that this can be changed but rather than risk mucking up my prized Prusa-Slic3r, I simply used Slic3r.
Obviously (or maybe not obviously) you have to turn off the brim and skirt settings. If you don’t then they are the items that dictate the maximum area in which you can print. They have to be accommodated on the print bed and they are larger than the enclosed model.
This has a couple of ramifications. The extruder does not get to extrude until it literally starts printing the job, which is not a good idea. So it would be wise to figure out adding some gcode to slic3r to get a little test extrusion done in a spare area before starting the print. I didn’t bother. But then, I was only printing targets to see what size I could print.
So that’s a simple way to get printing bigger on an Ender 3. I hope that helps.
Ender 3: Is it an 8 bit or 32 Bit Motherboard? (more on how to tell)
Creality updated the stock motherboard in their Ender 3 3d printer towards the end of 2020. So how do you tell if it’s an 8 bit or 32 Bit Motherboard? There is nothing external to the 3D printer that allows the user to figure out whether they have an older 8 bit Atmel board or a new 32 bit Arm board with the exception of of one thing. Creality took the opportunity to change the USB connector from a mini USB socket to a Micro USB socket on their stock board. I blogged about this HERE I think that this is still the easiest way to find out. But here’s some more information on identifying the boards. And… if this is not enough there more Here in a further post related to the CR Touch Self Leveling kit.
Continue readingConverting HEIC files to JPG or PNG on Ubuntu 18.04
HEIF stands for High Efficiency Image Format (file extension HEIC i.e. filename.HEIC). It is a new (ish) image file type.The HEIF image format builds images with a smaller file size and better image quality than the older jpeg standard. That’s why Apple has moved over to it as its default image standard on their new phones. Evidently Android will soon too. So how do you go about converting HEIC files into JPG? On Ubuntu 18.04 there’s a handy little package called heif-examples you just have to install it. As so:
sudo apt-get update
sudo apt-get install libheif-examples
Now to convert a file to (say) jpg on the command line its:
heif-convert filename.HEIC filename.jpg
That appears to convert the file to a jpg with 100% quality. With me I ended up with a jpg that was about 30-35% larger than the HEIC file. You can though reduce the size of the jpg by reducing the quality of the conversion. Like so:
heif-convert -q 75 filename.HEIC filename.jpg
The -q value can go from 100 (default) to whatever you can get away with. For me (and family snaps) 75 always seems a good compromise. Again with a short simple test my 75% quality jpg output file was smaller than the original HEIC file by about 20%.
I also tried the conversion to png files but I found that the resulting png file inflated the file size by 700%. I hasten to add though the image being used was not really suitable for png. But even so the image came out 5% bigger than just by using Gimp to convert the 100% jpg to png at level 9 compression. I also found I couldn’t change the compression on the png. Adding -q 75 or -q 9 (or whatever) did not affect the final png file size. This is probably my fault. If you know how to do this please enlighten me.
You can also go the other way and convert jpgs to HEIC files. But this needs a different tool from the same repository and in it’s simplest form you use it like this:
heif-enc filename.jpg
This will generate a HEIC file of the same name in the same directory
There are more options with this command than with heif-convert the full list is here. The main ones (imho) are:
- -q Defines the quality of the output heif image. Like hief-convert this goes from 0 – 100
- -L This makes the output HEIC file lossless and overrides -q (if it exists)
- –no-alpha This (I think) removes the background making the image transparent.
- -o Defines the output file name.
Interestingly, when I tested this command I found I got better compression when I specified the output filename.
i.e.:
heif-enc filename.jpg -o otherfilename.HEIC
Than when I just let it default. I don’t know why.
So there’s how to go about converting HEIC files into JPG files (and PNG’s too – with reservations)
Anyway here’s some serious respect to the guy(s) who wrote this converter.
You can find more about them here. The repository for this code with further information (especially on heif-enc) is on this Github Link.
My other Linux/Ubuntu Howto’s and Gotcha’s are on this link.
HP Compaq DC5800 Kernel Panic on Ubuntu: Fix
Some years back I inherited an old HP Compaq DC5800 Micro-tower. I happily ran Ubuntu 16.04 LTS on it for a long time. Then one one day I did the ritual updates (which included the kernel) and on rebooting, the DC5800 did a Kernel Panic and halted. I booted using the previous kernel and all was fine. The machine never managed to update the kernel again. If I tried, it suffered a Kernel Panic on reboot. I have (yesterday) found the solution to the problem. Below is a guide with pictures.
Continue readingIs RhythmBox Missing Music Files? Here’s a Simple Fix
Nothing drives you more mad than buying some new music and then having to struggle to get it to play. This hit me when Rhythmbox was missing new music files I had added to my Music folder on my Ubuntu 18.04 system. I checked the preferences in Rhythmbox and even though the “watch my library” box was ticked, I got no updates.
Continue readingEnder 3: Attaching Glass Bed without Spring Clips.
My Ender 3 came with a glass bed and spring clips as well as the more usual composite bed. I like the glass bed and generally get (what I regard as) good results from it. I’ve hardly ever used the composite bed. But the thing I really hate with the Ender 3 is attaching the glass bed with spring clips to hold the bed in place.
Continue readingInstalling Latest Cura and Slic3r on Ubuntu 18.04. Prusa Slic3r too!
The library of applications for Ubuntu 18.04 is getting old. It is after-all over 3 years since 18.04 was released. But you can install the latest Cura and Slic3r versions on Ubuntu 18.04. As well as the latest Prusa Slic3r if you prefer. Here’s how.
Continue readingFreecad: Wedges and Pyramids Explained
Like most things in Freecad you can build Wedges and Pyramids in any number of ways. But the most readily available and direct are the ones under “Creation of parameterised geometric primitives” in the “Part” workbench.
Continue readingEnder 3: My Auto Home is off the plate. Here’s Why.
Auto home on a Creality Ender 3 (and presumably all other 3D printers) moves the bed and the extrusion nozzle into a default “zero” position. In essence the bed and the extrusion nozzle are moved so they hit the end stop microswitches which signal to the controller board where the bed and nozzle are.
Mostly people assume that this is 0,0,0. In fact that is what it is set to in the factory defaults for the Ender 3. But if you look at the bed of an Ender 3 after it has been auto homed you will find that the nozzle is actually off the bed by about 5mm. It is not in the bottom left hand corner of the plate as you would expect.
Continue readingEnder 3. 32 bit? Or 8 bit? Here’s how to tell
Half way through 2020 Creality changed the processor board on their popular Ender 3 3D Printer. So you may not know if your Ender 3 is 32 bit or 8 bit. Here’s an ad link to the latest Ender 3 3D printer on Amazon today
Continue readingPrinting a Lithophane as a Block Engraving on an Ender 3
A lithophane is in essence a 3D image. Here I explore reducing it to simply 2 tones so I end up with what looks like a block engraving that can be used (for example) to print on card.
Continue readingFreeCad: Angled Text on a sloping surface
This is just a simple little Freecad project to design and build a keyfob with angled text like the one below. In this previous post I detailed how to cut text into a flat object. This does the reverse. It raises text out of an object. Just to make it a little more interesting this is done on a sloping face. I skim over some parts in this. If you get stuck try this post series that describes these skimmed topics in more detail.
Open FreeCad and change the Start screen to the Part Design Screen by selecting from the dialog box in the middle of the top bar. Then click on start body and finally click on start sketch.
Continue readingGimp Print Centering. Here’s How
I had a small image that an artist asked me to blow up to A4 size so they could use it as an aid when painting a portrait. I was using Gimp and print centering was vital to get it all in.
Continue readingSimple Freecad Text Example: How to cut Text in 3D Design
The end result of this simple Freecad text example is a childs nameplate stencil like this one. This one was printed on a Creality Ender 3. This one needs a little clean up but you get the idea.
Continue readingGrowing Apple Trees from Seed? Here’s What Happens.
I grow a number of different apples trees. They are all grafted except for one which I grew from seed. Want to know what happens when you start growing apple trees from seed? Here’s what I did and what happened.
Continue readingFreecad Font Path Set-up for Text String Shapes.
When you add a text string to a 3D project (like this simple one) you have to fully specify the path to the font you are using. Which is a pain and is error prone. But there is a Freecad font path set-up in “preferences”. You can specify the base directory of all the fonts. This considerably simplifies the selection. Or you can even just set one font in “preferences” and just use that with no further selection needed. But there’s a small gotcha that tripped me up for a while.
Continue readingPrinting on Creality Ender 3 with Pronterface USB connection.
This is the last part of a small series (starts here) tracking the design and processing of an ultra simple 3D project using Freecad and Prusa Slicer. Together they produced a Gcode file. This can be printed as usual using a SD Ram card. But this post is mainly about printing on a Creality Ender 3 using Pronterface (also called Printrun) on a USB connection.
Continue readingUsing Prusa Slicer to produce Gcode for a Creality Ender 3.
This is the third post in a series plotting the development of an ultra-simple plate from design in Freecad, processing the STL file using Prusa Slicer through to printing on a Creality Ender 3 3D printer. The first post in the series is HERE. In the previous post (Here) we produced a project of our 3D plate with two holes. Now we need to export it from Freecad as an STL file we can process it using Slic3r-PU
Continue readingHow to Turn a Simple Freecad Sketch into 3D Object.
This is the second part of producing a simple 3D printed object using Freecad, Slic3r, Pronterface and an Ender 3 3D Printer. Here we turn our plate sketch into a 3D object and add the holes. The first part covering using Freecad Sketcher is HERE.
Continue readingA Simple worked example with Freecad, Slic3r and Pronterface.
Many people intermittently use Freecad and the other associated software tools. So when they need to get a 3D design printing they have to go back up the learning curve each time. I expect that like me they go through a phase (each time!) of re-learning what should already be known. But my/your brain has “filed” it away. Hence I thought I’d produce an ultra-simple example with Freecad to remind me of the basics. If like me you are forgetful or maybe just starting to build your own 3D prints then I hope this helps.
Continue readingNeed a PDF document word count? Here’s a simple approximation.
PDF documents are great but there may come a time when you are reading/reviewing one when you need to roughly know what the word count of the document is. By their nature PDF’s are usually full of charts, images and tables that make the task difficult. Most (all?) free PDF viewers don’t give the reader a word count in situ. So you have to use either expensive software or another method.
Continue readingLocked in Maintenance Mode? Getting a WordPress Site Back Up.
WordPress is a complex beast and occasionally an update (automatic or otherwise) will fail to take the site out of maintenance mode after it completes. Most people never actually see their site in maintenance mode. It’ll look something like this below though you may not have the fancy image – just a battleship grey background.
Continue readingMy Domain Property Wouldn’t Verify in Google Webmasters. Here’s Why.
Google Webmasters (and it’s Google Search Console ) provides you with a Domain property verification string to allows you to get the full search data going to your site. The Domain Property shows all the search data for your site in one place rather than (say) separate data for https and http access. It is worth using.
Continue readingBypassing Amazon but still published on Kindle? Simple! Here’s How.
Lets say you run a email newsletter. Maybe you would like to provide your readers with something a little less email-like and get your newsletter content/links/downloads published on Kindle. For arguments sake let’s say you want to send your readership a free e-book to read on their Kindle once in a while. It could be fiction or fact. The subject matter is immaterial.
Continue readingConnecting Pronterface to Ender 3 3D printer with Ubuntu 18.04 LTS
I had an irritating problem when I tried to connect Pronterface on my Ubuntu 18.04 LTS system via USB to my Ender 3 3D printer. Whenever I tried to establish a connection I got permission denied displayed in the right hand side of the Proterface GUI.
Continue readingAudacity in-built Microphone Problems on Ubuntu – fix
I had a few problems getting my in-built microphone to work when using Audacity to record voice.
It all came down to a matter of settings.
Continue readingOpera on Ubuntu 18.04 and 16.04 won’t play videos – Simple Fix
If you install Opera on Ubuntu 18.04 (or 16.04) it all works – except for video playback. When you first install Opera (or upgrade Ubuntu) You (or at least I) get this:
Continue readingPoetry, Sex and Success.
A salty little (true) tale involving poetry, sex and a different type of success.
Aeons ago I was at university.
It was a “Science & Technology” university. In those days that meant that the male to female ratio was horrendously biased towards males.
Continue readingeBook Publishing & Promotion – The Reality
I appreciate that this is an opinionated post on ebook publishing. It will be a hard read for some that may make you angry. But I feel it has to be said.
We need to look at the reality of self-publishing as well as the dream.
Continue reading